This series of blog posts which I have converted from Youtube videos. I personally have really enjoyed these videos so in order to textually document them, these are essentially some screenshots and rough notes organised. 

Using the CLI
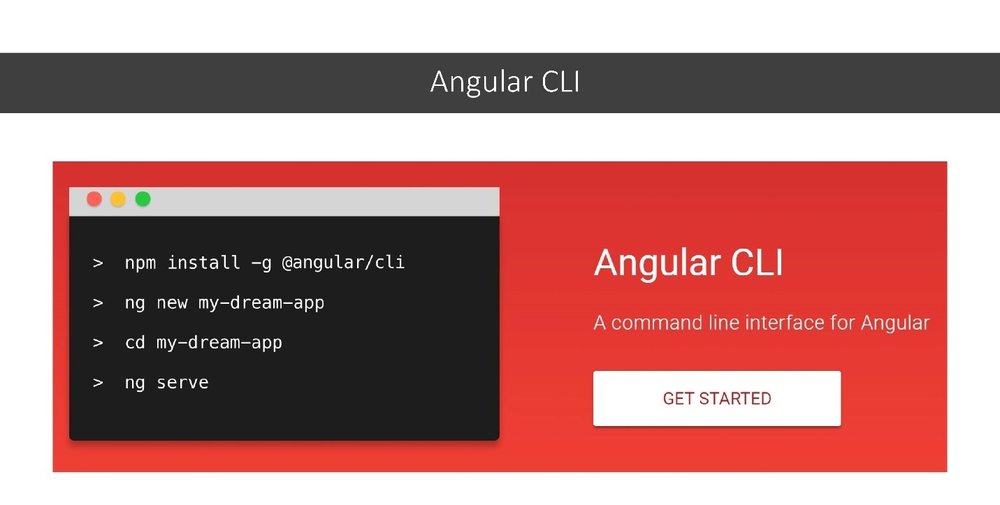
To use the angular CLI, it just requires calling ng new. It creates a new project. Then, the ng generate can be called in order to create components to create new services, new models, etc.
Vision

Can this be used for the custom stuff, if it was possible to create a project with custom templates which aligns with the content, corporate identity? Or if it was possible to create on-menu components or some other components which will be required on the regular basis.
Contents
1. Introduction of schematics.
2. How to create schematics? (custom things like on-menu items)
3. How to use parameters for cogeneration?
4. How to use templates?
5. How to scaffold the whole project?
Schematics
It is the tool used by the CLI to scaffold things, components, modules, and services. It is also the name of the project behind it. Schematics is also the name of the code generators created with it.
A collection is a set of schematics. A set of code generators which belong to each other.
Angular labs
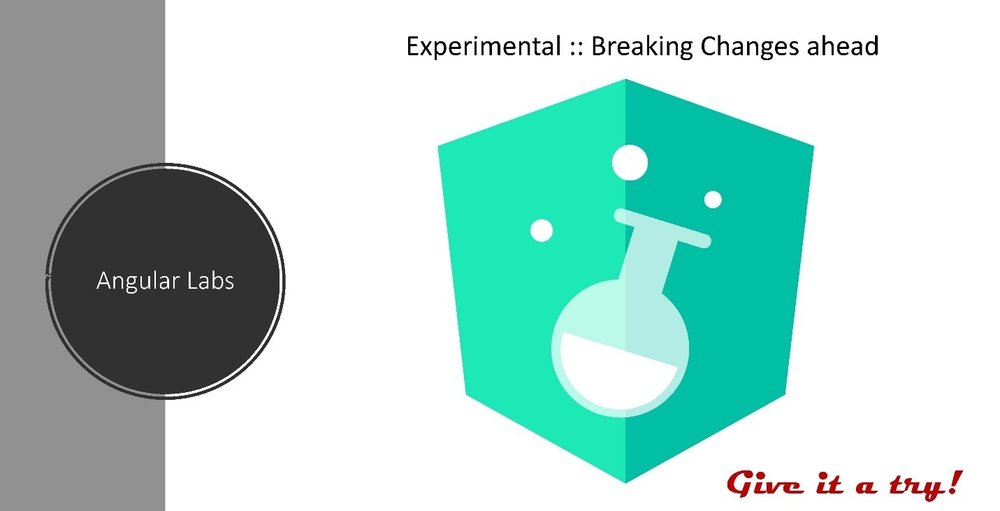
Schematics is currently experimental, which means the public API has not been stabilized which means it could be breaking changes
Nrwl Nx
Nrwl has created Nx, which is both, a library and a code generator leveraging schematics to create a workspace. A workspace is an environment, based upon the CLI that allows monorepo approach. This allows to have several projects at once- all belong to each other.
NgRx also published schematics project.
Schematics are atomic.
Schematics work like database transaction. When the codes are being generated, the files do not need to be modified on the hard disk. Instead of this, the files need to be modified in the staging area.
The staging area is represented by a tree object. It allows to add a new file or modify the existing file. It also makes it easier to delete existing files. After everything is altered, that needed to be altered, everything can be written back to the hard disk.
It guarantees that it is not possible that something breaks in the middle and that it is not possible that the project is left behind in an unknown stage. It is possible to transition the projects from one well-known stage into another consistent stage.
Scaffold collection

To create a custom schematic we need a schematic
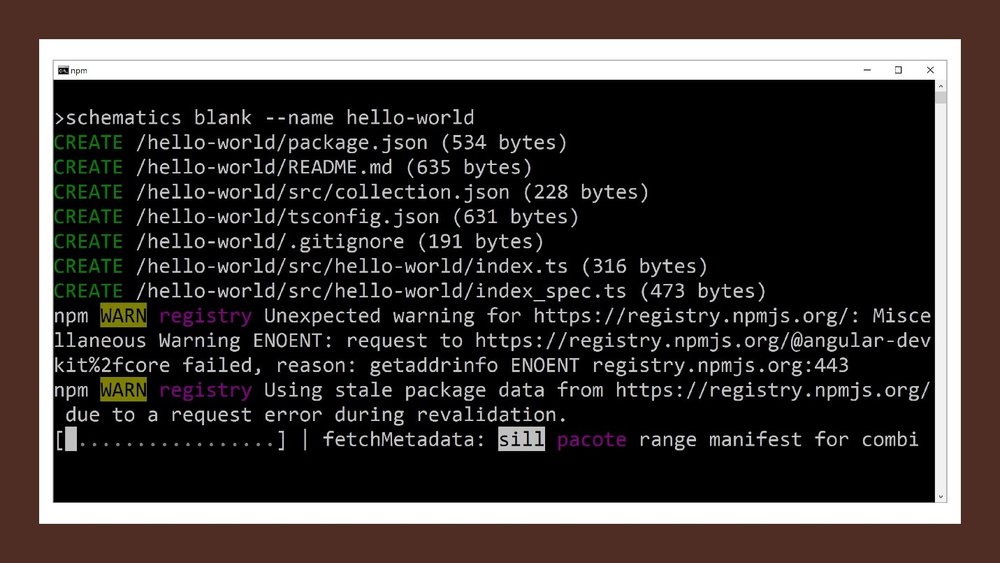
It is needed to install the schematic CLI tool. Then it is possible to scaffold a new schematics project using schematics blank. In addition to that, there is also a possibility to use schematics schematic to create a new project with some sample codes. The sample codes help a lot to learn schematics. It contains numerous things and a lot of commands which give information about how to use everything.
Down below is an image of how it would look like when a blank schematics project is scaffolded. It looks like scaffolding an angular app. There are several files generated and some libraries npm installed.
Rule 1 for surviving schematics
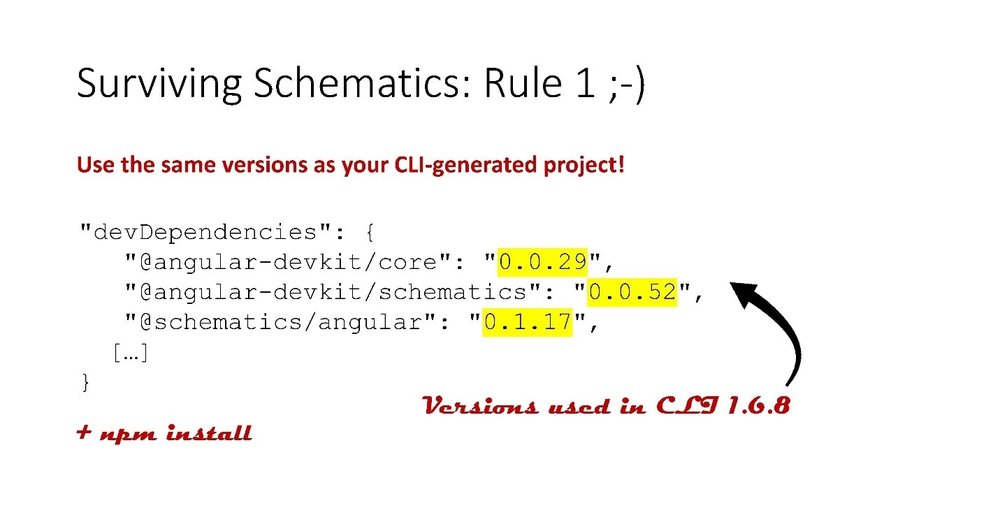
It is important to make sure that exactly same versions are used as within the CLI generated project. It creates a lot of problems otherwise.
Down below is an example of devDependencies which has been found within the CLI project. Along with aligning the devDependencies, it is required to install npm as well.
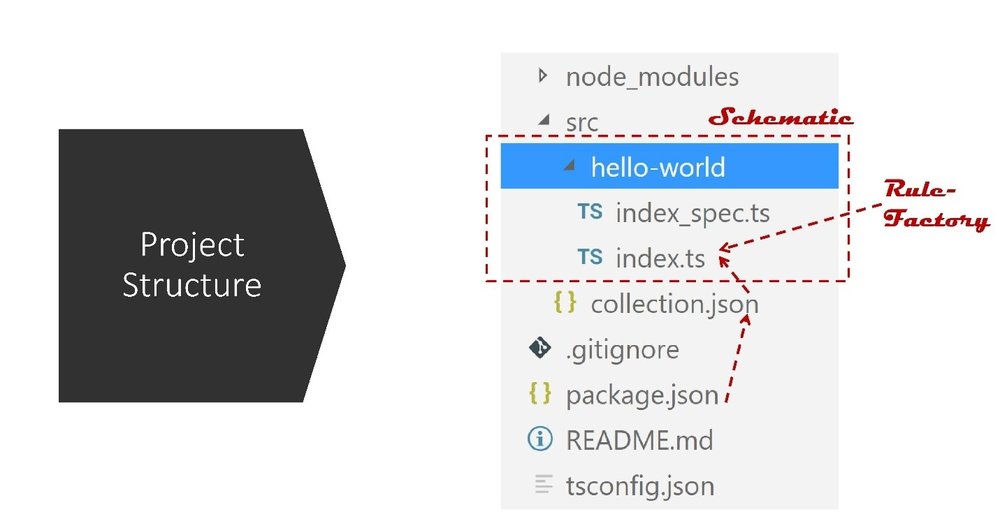
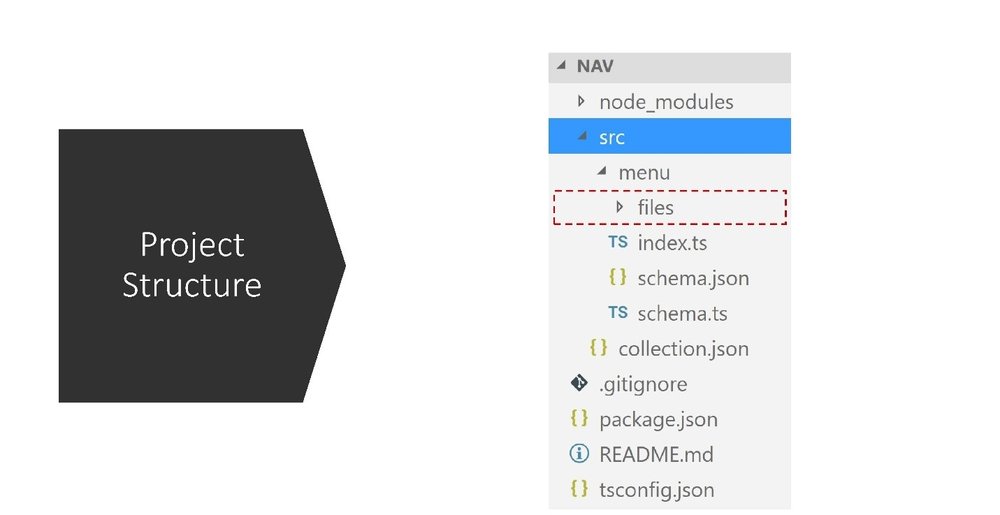
In the schematic project, the project structure can be seen like the one shown below. This is more or less npm package. There is tsconfig.json and package.json. The package.json is pointing at the collection.json. collection.json is describing all the code generators, all the schematics. Every schematic comes with a rule factory.
Rule factory
It is a function which takes some options. These options are the one passed into the Command line when calling the schematics.
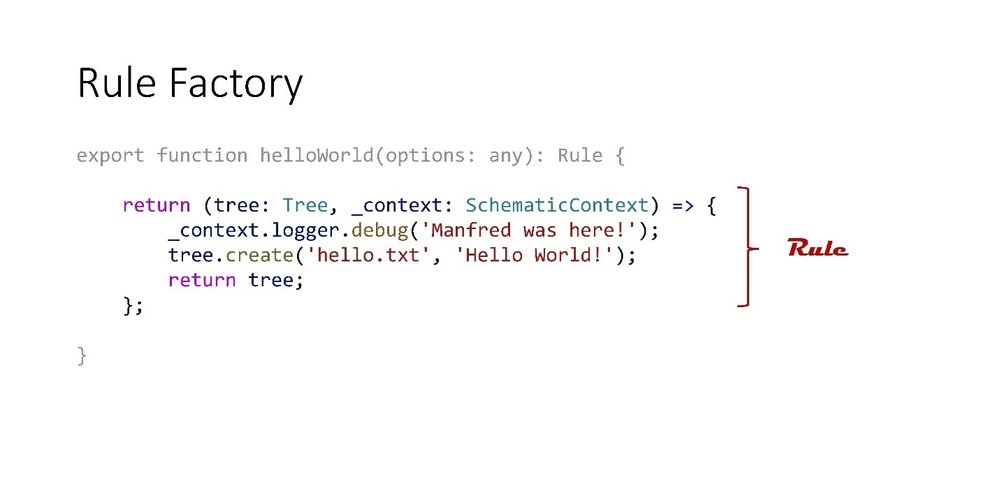
This function returns a function, which takes a tree and it takes a context object with some additional things. For example, as it can be seen here, the context contains a logger which can be used to log out some information. With the tree, it is possible to create some new files. For example, here, a hello.txt file is created
Testing

After this, it is essential to test the schematic, for that, it is required to build it.
Npm run build
Then the schematics can be run with the name of the code generator and schematic.
schematics .:hello-world
Here, a point and hello-world are used. The point means that collection is the current project and hello-world is the name of the code generator
Testing in the demo app

It can also be tested in another project. For instance, in a demonstration project. For this, it is required to npm install the schematics collection. Or, it is possible to link it by using npm link. Then, there is a requirement to use the schematics one more time. The first work which is appended here is the word of the collection, the name of the npm package and the second name is the name of the code generator. Here, both are named hello-world.
Instead of schematics, ng generate can also be used
DEMO
The collection.json is describing the collection and the package.json is pointing to that collection. Here, there is Hello-world schematics. It has s description as well as a factory.
Within the index file, there is factory, which is returning the rule, which in turn, is creating the file.
Parameters
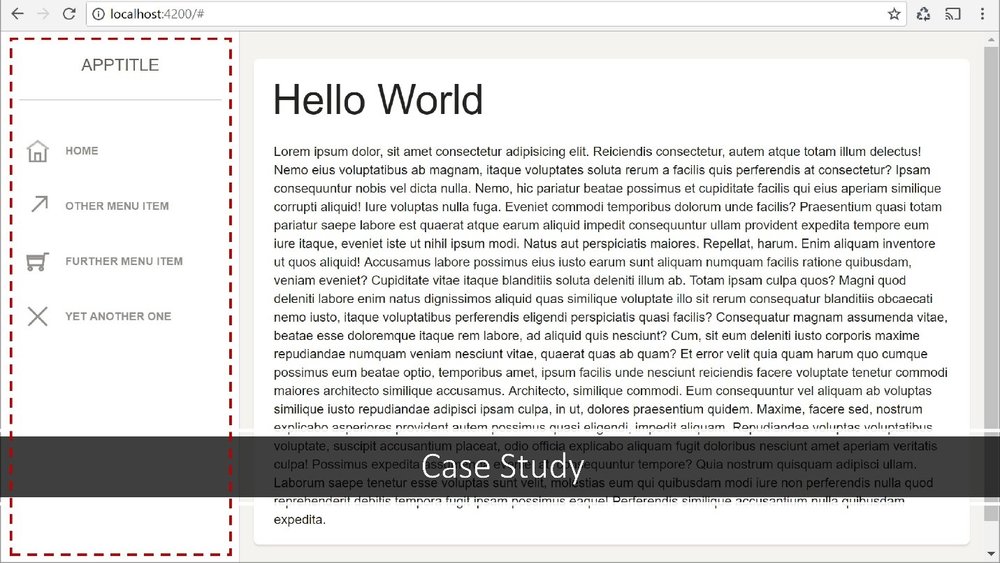
A demo, which is creating a menu component. This menu component consists of several files. There is an angular component, called, for example, side menu. But there is also a side menu item describing the items of the menu. Also, there are a side menu services which is providing all the items, telling the component which items to display.

The side menu item and side menu service are optional. When it is not being created, then the side menu component shall just display some hardcoded menu items.
Execution
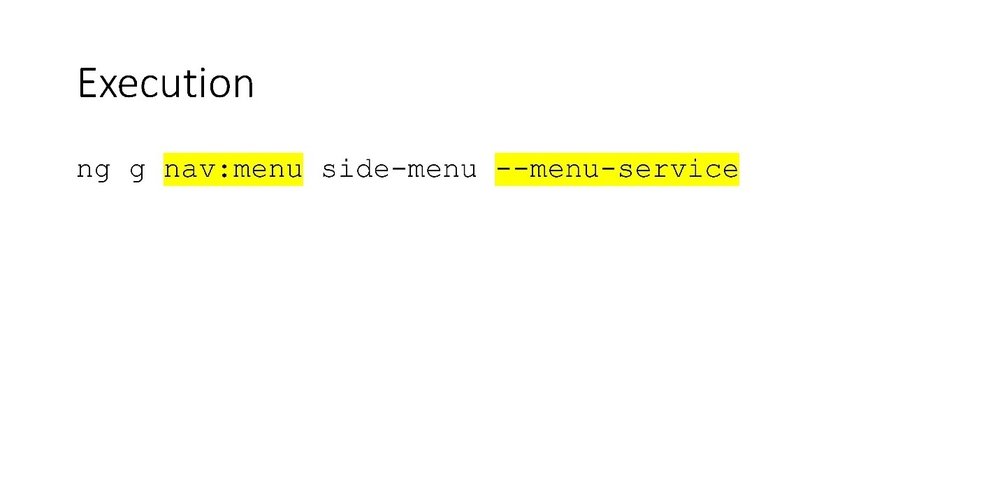
For the purpose, it is required to have a common practice. Like, ng generates with the name of required schematics, navigation menu in order to append a name of the menu-side menu, to add a flag that tells the code generator that this services shall be generated.
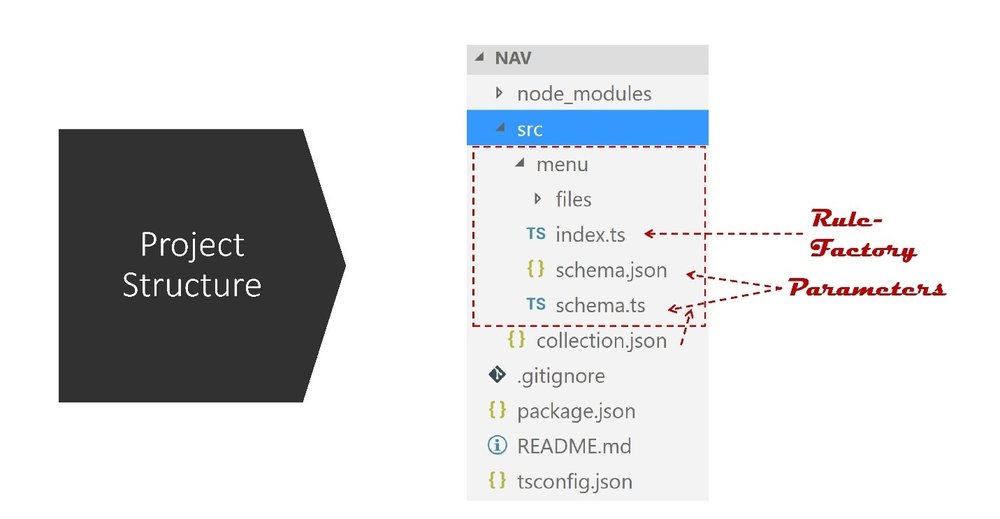
The structure of the schematics project, there is npm package, package.json, nodes modules folder and there is tsconfig.json. The collection.json is describing everything. Within the schematics, there is a rule factory. There are two more files which are describing the parameters that are allowed to pass.
There is a schema.ts file which contains the same but, in the form of typescript tasks.
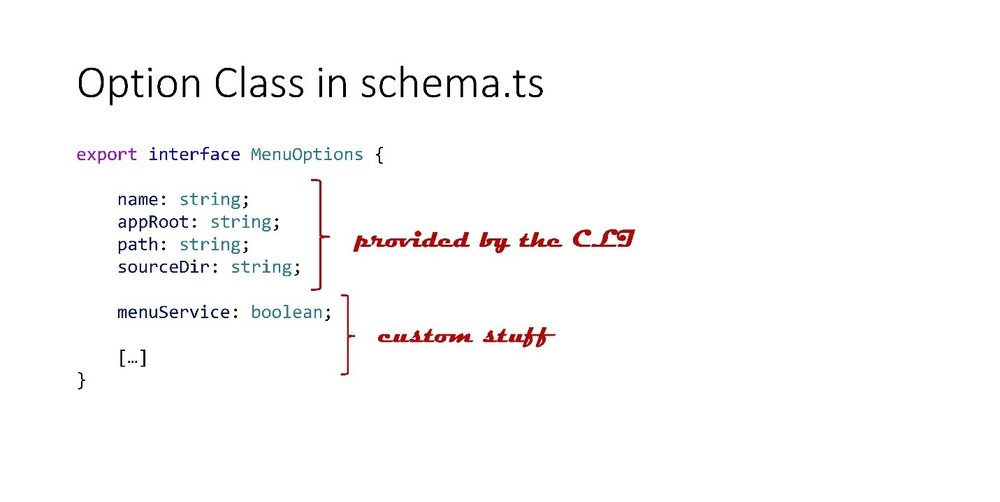
Options class in the schema.ts
Down below is how it looks like. Some parameters are automatically passed by the CLI and other parameters are custom parameters, like the menu service shown in the image.
Rule factory gets parameter object
In the project, there is another rule factory. This rule factory gets the menu options object, which is containing all the parameters. The rule can look into it and it can find out which options have been passed. When the requirement is to create a side menu component, typescript is least demanded.

Instead, it is better to use templates, to tell the object how a component class looks like, how a component template looks like or how the service looks like
For this purpose, a folder is created with the name of files.
Template
Within this folder, there is template like the one shown below. It looks like a PHP file.
There is a code which is needed to be generated and there are some procedures which are executed. Some procedures which in placeholders are rendered out to the page.
In the example above, there is a passed function and a passed property name, this is the name of the component which will be scaffolded. The function is called classify.
Template names are templates

The template name itself is a template. It can contain the placeholders. For example, here a placeholder is used, path. It just needs to be written between 2 underscores. There is a passed property name, the placeholder’s name, NAME- which contains the name of the components required to be generated.
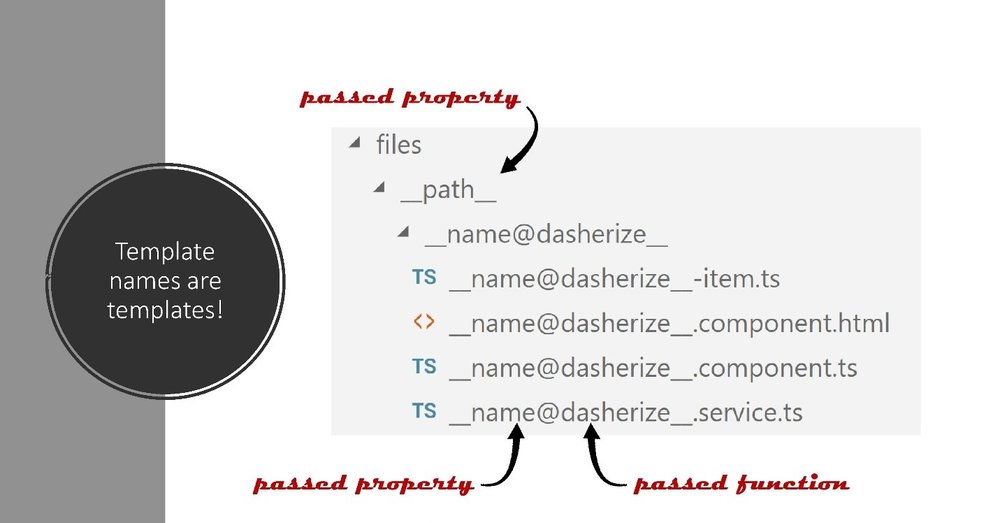
Even functions can be used within the file names. For example, here, the function ‘dasherize’ is used. It is taking the name and it is marking the name so that it fits for the file name.
Rule calling templates
To call a template, rule factory is required, returning a rule and then it is required to find a template source. In the world of schematics, a source is just something which is taken into the tree. Here, the source is based upon every file in the files folder.

Those files are piped through these functions. The filter template function is just filtering the templates, it is deciding upon whether that service is required or not. The template function is just executing the templates. The template function gets passed properties. The stringUtils has all the functions that have been called before. The move is replacing the placeholders within the file names.
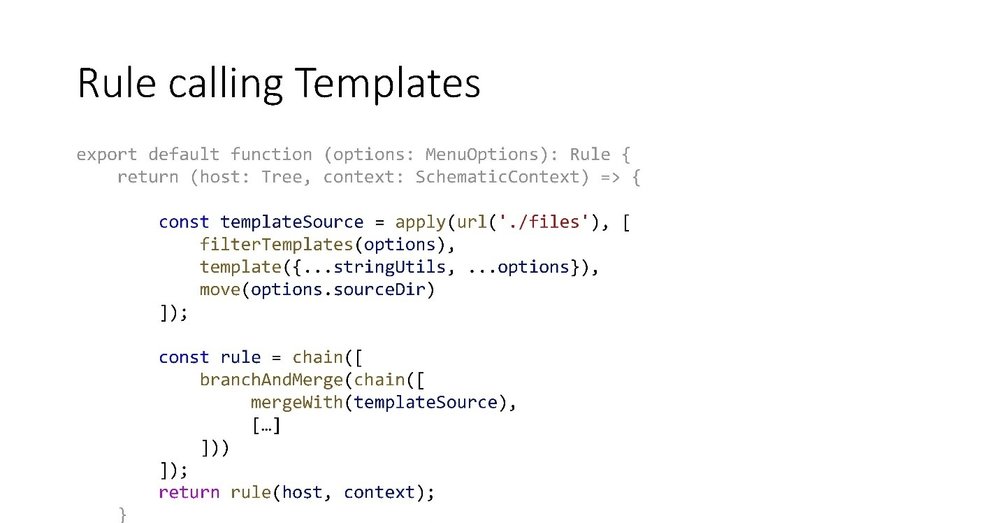
With the template source, it is possible to construct a new rule. The new rules are created by chaining the existing rules.
Scaffolding whole angular application
Needed steps
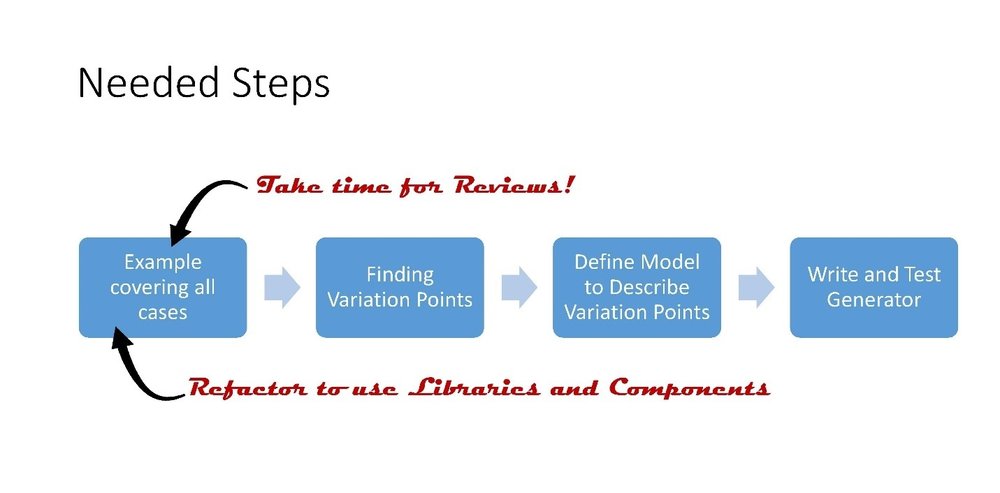
Create an example which is covering all the cases which will be generated using the code generator. (Take time for the first example and review it first and it is a good idea to embrace libraries and components)
Finding the variation points. The things which differ, which change when a project generated.
Define a model for the variation points.
Write the code generator.
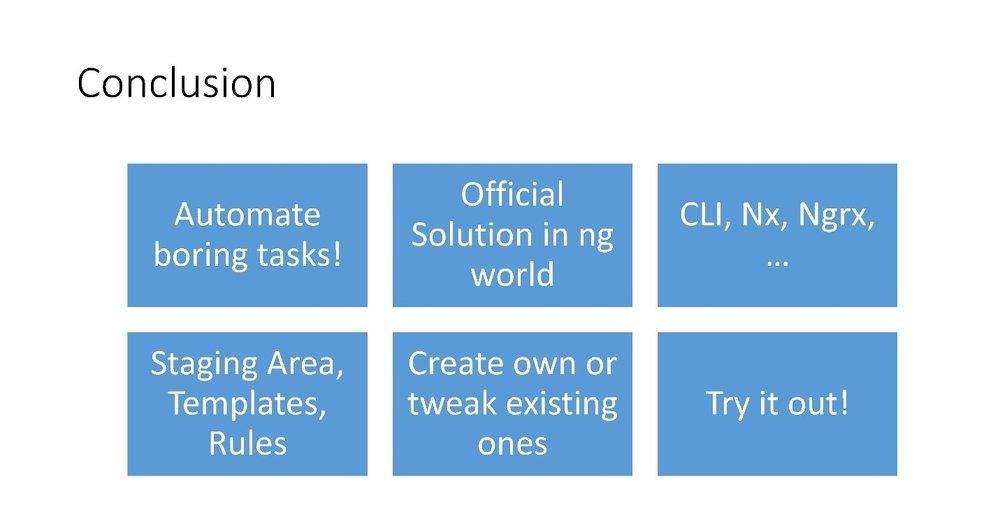
Conclusion